If you want to see my very first drone build, check it out here
After creating my first drone using off-the-shelf parts and open-source software, I knew there was still a lot to learn.
I still didn’t understand PID Feedback or the architecture of drone flight software. Therefore, I decided to build a completely
custom drone with a Raspberry Pi 3 (later changed to Arduino Teensy) running my own custom flight software.
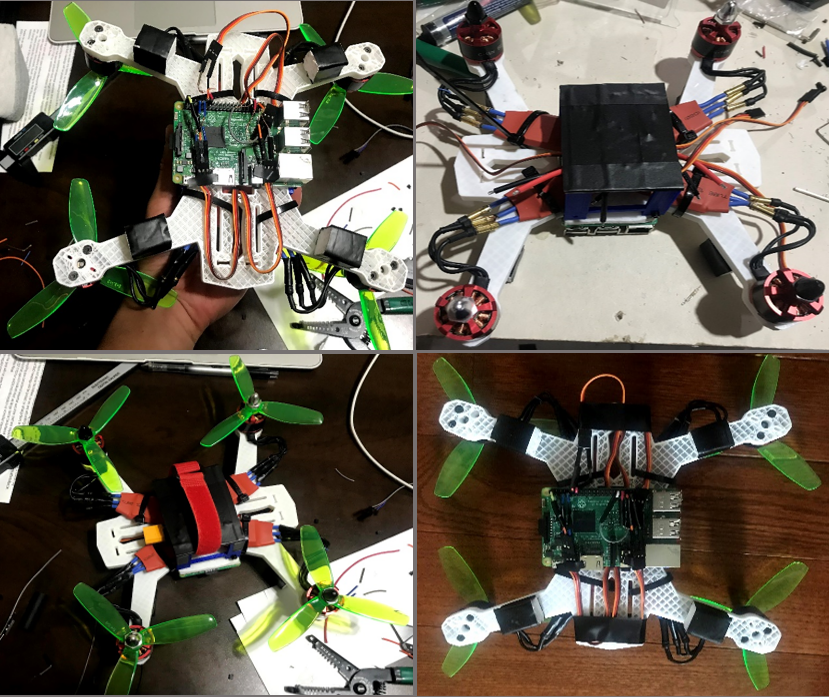
Mechanical Design
The drone’s frame was designed in Fusion 360 and 3D-printed using PLA plastic. I used four D2212 motors outfitted with generic 5-inch
propellers for a maximum thrust of roughly 2.5kg. I decided to use cheap PWM Electronic Speed Controllers to control the motors, as I was
running tight on my budget, and they could easily interface with the PWM outputs on my Raspberry Pi 3 flight computer. The onboard IMU (Adafruit BNO005)
provided real-time angular positions that could be read by the flight computer. All of this was powered by a 3S, 2200mAh LiPo battery that had a
theoretical battery life of 10-12 minutes.
PID Feedback
The goal of this project was mainly to learn about PID feedback. Though the code was relatively simple (shown on the right), the hard part lied in tuning
the feedback system and finding the right gains. Because I didn’t know about Simulink and other auto-tuning systems, I decided the best way to find these
gains was through brute force, trial-and-error. I designed a wooden test stand that isolated the drone’s rotation to just one axis and got to work in my
garage iterating through different gains to find the right balance for smooth, level flight.
Watch how my drone becomes smoother through manual tuning
Wow...that's pretty terrible
Getting better
Pretty good
This project is still in the works. Stay tuned to see it fly!